I have configured the popular social login providers for numerous applications over the years. Despite knowing a few things about identity, I find the configuration process tedious and confusing, and when talking to other developers, they have similar complaints.
We strive to simplify login and registration at Hellō, and question why you need deep expertise in OAuth and OpenID Connect to use social login. How can we help you get up and running quickly so you can decide if Hellō is the right solution for you? This question led us to not require you to start your journey with the Hellō Developer Console, but with a simplified initial experience that creates a basic application for you.
Hellō Quickstart
Our first use of Quickstart was with Hellō Login, our free WordPress plugin. You don't need to figure out your redirect_uri, or copy and paste a client_id. No need to manage a client secret. You don't even need to understand what those are. If your blog has a privacy policy and default image, Quickstart will configure them for you. This video shows how Quickstart lets you add Hellō to a blog and offer users all popular social login choices in 19 seconds vs 13 minutes for just Google with an alternative plugin.
When creating our Next.js SDK for Hellō, we saw an opportunity to innovate to simplify configuration even more.
Redirect URI Discovery
In our WordPress plug-in, we have code running in the application that knows its callback URL, which we can pass to Quickstart to be configured for the app at the Hellō Developer Console.
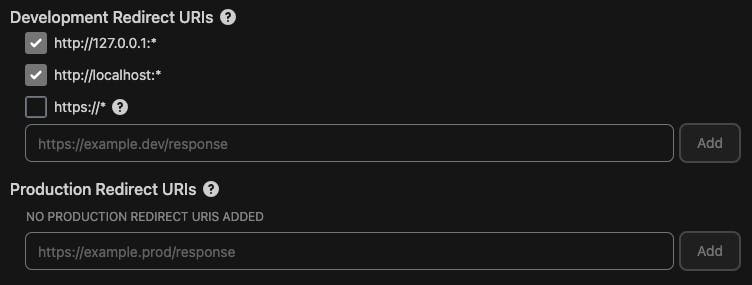
For application development, we enable localhost by default which allows you, the developer, to get up and running on your own machine when starting with Hellō -- but you still need to configure the redirect_uri for any deployments that you want to share. On modern development platforms such as Vercel, configuring the redirect_uri is much more complicated as each preview deployment is at a randomly generated hostname by default.
When building our Hellō Next.js Sample application that demonstrates how to use our @hellocoop/nextjs npm module, we set a goal to eliminate any manual configuration requirements when running locally, and when deploying to Vercel. To simplify endpoint discovery as well as deployment, there is only one endpoint (/api/hellocoop) for all functionality - login, logout, and callback (redirect_uri). To learn the URL location of the endpoint when login is called, we send a small script back to the browser to get window.location.href and send it back to the endpoint. This provides the correct redirect_uri even when the server is behind a proxy. We then use thisredirect_uri to create the authorization request.
Hellō https://*
Discovering the redirect_uri is only the first step. If the application is running on http://localhost:* Hellō will let the developer through as we have enabled those redirect_uri values (details at Hellō localhost). To enable auto-configuration, we added an option to enable any https://* URL for the development team.

This allows the development team to flow through Hellō for an arbitrary redirect_uri. The Hellō Wallet appends a wildcard_domain query request to the response so that the @hellocoop/nextjs package can detect a member of the development team has used an unconfigured redirect_uri, and prompt them to add it to their app after logging them in. They are then taken to the Hellō Developer Console where they can decide to add it as a Development or Production Redirect URI -- and the app is configured!
For those interested, here is the sequence diagram:
Redirect URI Auto-configuration

